Growing microgreens indoors is a fun and easy way to incorporate fresh greens into your diet all year round. Here are the steps to grow microgreens indoors:
- Choose your container: You can use any shallow container with drainage holes. You can also use seed trays, recycled plastic containers or even a baking tray.
If a container has no drainage holes, it can lead to waterlogging of the growing medium and root rot in the plants. Drainage holes allow excess water to drain out, preventing water from building up in the bottom of the container. If you are using a container without drainage holes, it is important to create drainage holes yourself. You can use a drill or a sharp tool to create small holes in the bottom of the container, being careful not to damage the container or harm yourself. Alternatively, you can place a layer of gravel or pebbles in the bottom of the container to improve drainage. However, it’s important to ensure that the layer of gravel or pebbles is thick enough to allow for adequate drainage, but not so thick that it takes up too much of the growing space.
- Choose your growing medium: You can use soil or hydroponic growing medium to grow microgreens. Make sure to choose a medium that is nutrient-rich and free of contaminants.
Soil
To ensure the soil is nutrient-rich and free of contaminants, it’s important to use high-quality soil that is specifically designed for growing plants. You can look for soil that is labeled as organic or sterilized to ensure that it is free of contaminants. Here are some other tips:
a. Test the soil: Before using soil to grow microgreens, you can test the soil quality by sending a sample to a lab for analysis or by using a soil testing kit. This will give you an idea of the soil’s nutrient content and pH levels, which can help you determine if additional nutrients or amendments are needed.
b. Choose a soil blend: You can also choose a soil blend that is specifically designed for growing microgreens. These blends are often nutrient-rich and contain a mix of different organic materials like compost, peat moss, and vermiculite. You can find soil blends at your local garden center or online.
c. Make your own soil mix: If you prefer, you can also make your own soil mix by combining different organic materials like compost, peat moss, and vermiculite. This will give you more control over the nutrient content and pH levels of the soil.
d. Use compost: Adding compost to the soil can help improve nutrient content and soil structure. You can make your own compost using kitchen scraps and yard waste, or you can purchase compost from a garden center.
Overall, choosing nutrient-rich soil and avoiding contaminated soil is key to growing healthy microgreens. By testing the soil, choosing a quality soil blend, making your own soil mix, using compost, and avoiding contaminated soil, you can ensure that your microgreens have the best chance of thriving.
Hydroponic
Hydroponic growing medium is a substance or material that is used to support the growth of plants in a hydroponic system. In hydroponic gardening, there is no soil, so the plants rely on the growing medium to provide support and nutrients. A hydroponic growing medium should be pH neutral, provide good drainage and aeration, and be capable of holding moisture and nutrients.
There are different types of hydroponic growing mediums, including:
a. Rockwool: This is a popular hydroponic growing medium made from spun rock fibers. It comes in different sizes and shapes and provides excellent water retention and air circulation.
b. Perlite: This is a lightweight, porous volcanic glass that is used to improve soil drainage and aeration. It is also used as a hydroponic growing medium because of its ability to hold water and nutrients.
c. Vermiculite: This is a natural mineral that is used as a soil amendment to improve water retention and aeration. It is also used as a hydroponic growing medium and is capable of holding moisture and nutrients.
d. Coconut Coir: This is a natural fiber extracted from coconut husks. It is used as a hydroponic growing medium because of its ability to hold water and nutrients.
e. Peat Moss: This is a decomposed plant material that is used to improve soil structure and water retention. It is also used as a hydroponic growing medium because of its ability to hold water and nutrients.
Hydroponic growing mediums are an important component of a hydroponic system, as they provide the necessary support and nutrients for plant growth. The choice of growing medium will depend on the type of hydroponic system being used and the type of plants being grown.
Matching the type of growing medium with the type of hydroponic system and type of plants being grown is important to ensure optimal plant growth and yield. Here are some considerations to keep in mind when choosing a growing medium:
i. Type of hydroponic system: Different hydroponic systems require different types of growing medium. For example, a deep water culture system may require a lightweight growing medium like expanded clay pellets, while a drip system may require a heavier medium like rockwool.
ii. Type of plants being grown: Different types of plants have different growing requirements. For example, plants with shallow root systems like lettuce and herbs may grow well in a lightweight growing medium like coco coir, while plants with deeper root systems like tomatoes may require a heavier medium like perlite.
iii. Water retention: The growing medium should be able to hold water and nutrients for the plants, but not be too waterlogged. Plants that require a lot of water like cucumbers may require a medium that holds more moisture, while plants that require less water like succulents may require a medium that drains quickly.
iv. Aeration: The growing medium should provide adequate oxygen to the roots of the plants. Plants that require a lot of oxygen like basil may require a medium that is lightweight and porous, while plants that can tolerate less oxygen like tomatoes may require a heavier medium.
v. pH levels: The growing medium should be pH neutral to avoid affecting the pH of the nutrient solution. Some growing mediums like rockwool and coco coir have a naturally high pH, so they may require pre-treatment before use.
It’s important to research the specific requirements of the hydroponic system and plants being grown to choose the appropriate growing medium. Experimentation and observation can also help determine which growing medium works best for your specific setup and plants.
When researching the specific requirements of a hydroponic system and plants being grown to choose the appropriate growing medium, it’s important to consider several factors.
Firstly, the type of hydroponic system being used will determine which growing medium is appropriate. For example, in a deep water culture system, the plants’ roots are submerged in water, so a lightweight growing medium like expanded clay pellets is often used to support the plants’ roots while allowing for adequate oxygenation. In contrast, in a drip irrigation system, a heavier growing medium like rockwool may be used to anchor the plants and retain moisture.
Secondly, the plants being grown have specific growing requirements that must be taken into account. For example, leafy greens like lettuce and spinach have shallow roots and require a growing medium that is lightweight and retains moisture, such as coco coir or perlite. In contrast, plants with deeper root systems like tomatoes require a heavier growing medium like perlite or vermiculite that can provide adequate support and drainage.
Thirdly, the water retention and aeration properties of different growing mediums must be considered. For example, plants that require a lot of water like cucumbers may require a growing medium that holds more moisture, like coco coir, while plants that require less water like succulents may require a medium that drains quickly, like perlite or sand. Similarly, plants that require a lot of oxygen like basil may require a medium that is lightweight and porous, such as coconut coir, while plants that can tolerate less oxygen like tomatoes may require a heavier medium like perlite.
Fourthly, the pH levels of different growing mediums must be evaluated. Some growing mediums like rockwool and coco coir have a naturally high pH, which can affect the pH of the nutrient solution and ultimately affect plant growth. In these cases, the growing medium may need to be pre-treated before use or pH adjusted with the appropriate solution.
Lastly, seeking out recommendations and reviews from other hydroponic growers can be helpful when choosing a growing medium. For example, a quick online search for “best growing medium for hydroponic tomatoes” can yield recommendations and reviews from experienced growers who have had success with different growing mediums.
Overall, choosing the appropriate growing medium for a hydroponic system requires careful consideration of several factors, including the type of hydroponic system, the plants being grown, the water retention and aeration properties of the growing medium, the pH levels, and recommendations from other growers.
- Choose your seeds: You can choose from a variety of seeds like arugula, kale, mustard, broccoli, and radish. Make sure to choose seeds that are labeled for microgreens and are untreated.
It depends on the person’s home and what seeds they have on hand, but some common seeds that may be readily available at home for growing microgreens include:
- Alfalfa
- Basil
- Chia
- Cress
- Fenugreek
- Mustard
- Radish
- Sunflower
These seeds can often be found in health food stores or online, and some may already be present in a person’s pantry for culinary use. It’s important to note that while many types of seeds can be used to grow microgreens, it’s best to choose seeds that are labeled for microgreens and are untreated to ensure the best results.
- Sow your seeds: Spread the seeds evenly over the growing medium. Make sure to sow the seeds densely, but not too thickly. Then lightly cover the seeds with soil or growing medium.
When sowing microgreen seeds, it’s important to strike a balance between sowing them densely and not sowing them too thickly. Here’s what that means:
Sowing seeds densely means that you want to scatter enough seeds so that they cover the growing medium and there are no bare spots. This will help ensure that the microgreens grow evenly and don’t have any gaps or thin areas.
However, if you sow the seeds too thickly, the microgreens may become overcrowded, which can lead to a number of issues. Overcrowding can cause the plants to compete for resources like water, nutrients, and light, which can stunt their growth or cause them to die off. It can also make it difficult to harvest the microgreens, as they may be tangled together or too close to the soil surface.
To avoid sowing seeds too thickly, you can use a seed spreader or your fingers to distribute the seeds evenly over the growing medium. You want to aim for a dense but not overcrowded layer of seeds. The exact density will depend on the type of seed and the size of the container, so it may take some trial and error to find the right amount.
Overall, sowing seeds densely but not too thickly is key to growing healthy and abundant microgreens.
After you have sown the microgreen seeds on top of the growing medium, you need to cover them lightly with a layer of soil or growing medium.
This layer should be thin and just enough to cover the seeds. The purpose of covering the seeds is to protect them from drying out and to create a dark and moist environment that will help them to germinate and grow.
Be careful not to cover the seeds too deeply, as this can prevent them from getting the light they need to grow. As a general rule, you want to cover the seeds with a layer of soil or growing medium that is about as thick as the seed itself.
Once you have covered the seeds, you can mist them with water to keep the growing medium moist. Then place them in a warm and well-lit area and wait for them to germinate and grow into healthy and delicious microgreens!
- Water your seeds: Water the seeds gently with a spray bottle or a watering can. To prevent the seeds from rotting, avoid overwatering.
When you water your microgreens, be careful not to give them too much water. Overwatering means giving them more water than they need, and this can cause the seeds to rot.
Seeds need a certain amount of moisture to germinate and grow, but too much water can drown them and create a soggy environment that is perfect for fungi and bacteria to grow.
To avoid overwatering, you should water your microgreens only when the growing medium starts to dry out. You can test this by sticking your finger into the soil or growing medium and feeling for moisture. When it no longer feels moist to the touch, it’s a sign that watering is needed.
When you water, use a spray bottle or a watering can with a fine nozzle to avoid saturating the growing medium. Water the microgreens gently and just enough to moisten the top layer of soil or growing medium.
Remember, it’s better to underwater than to overwater your microgreens. As they grow, you can adjust your watering schedule based on their needs.
- Cover your container: Cover the container with a lid, plastic wrap or a clear plastic bag. This helps to create a humid environment that is ideal for germination.
After you have sown the microgreen seeds and lightly covered them with soil or growing medium, you can cover the container with a lid, plastic wrap, or a clear plastic bag.
This covering helps to create a humid environment that is good for the seeds to germinate, which means to start growing into microgreens. Humidity is the amount of moisture in the air, and seeds need a certain level of humidity to sprout and grow.
The covering traps in moisture and creates a mini greenhouse effect that can help the seeds germinate faster and more evenly. It also helps to keep the growing medium moist and prevents it from drying out too quickly.
Once the seeds have germinated and started to grow, you can remove the covering to allow for better air circulation and prevent mold or mildew from forming. But during the germination phase, keeping the container covered can help give your microgreens the best chance for success.
- Place your container in a warm, well-lit area: Microgreens require bright, indirect sunlight or artificial light to grow. The perfect locations for growing microgreens are a sunny windowsill or underneath a grow light.
To help your microgreens grow, you need to put the container in a warm and well-lit area. Microgreens need a lot of light to grow, but direct sunlight can be too strong and damage them.
So, it’s best to place the container in a spot with bright, indirect sunlight or under an artificial light. A sunny windowsill that doesn’t get too hot is a good place, or you can use a grow light designed for indoor gardening.
In addition to light, microgreens also need warmth to grow. The ideal temperature is between 60-75°F (15-24°C). If the temperature is too low, the seeds may not germinate, and the microgreens may grow slowly or not at all.
So, make sure to put your container in a warm and well-lit spot to give your microgreens the best chance to grow strong and healthy.
- Uncover your container: Once the seeds have germinated (usually within a few days), remove the cover and place the container in a well-lit area.
Once your microgreen seeds have started to grow (which usually takes a few days), it’s time to uncover the container. This means removing the lid, plastic wrap, or clear plastic bag that you used to create a humid environment for the seeds to germinate.
Now that the seeds have sprouted, they need more air circulation and light to continue growing into healthy microgreens. So, remove the cover and place the container in a well-lit area, such as a sunny windowsill or under an artificial light.
Make sure the microgreens are not exposed to direct sunlight, which can be too strong and cause them to wilt or dry out. And remember to water them regularly, but not too much, to keep the growing medium moist but not waterlogged.
By following these steps, you can grow delicious and nutritious microgreens right in your own home!
- Water your microgreens: Water your microgreens regularly, once or twice a day, using a spray bottle or watering can. Keep the growing medium just moist, ensuring no water logging.

To help your microgreens grow, you need to water them regularly. This means giving them water once or twice a day, depending on how quickly the growing medium dries out.
Watering your microgreens gently can be done with either a spray bottle or a watering can that has a fine nozzle. Make sure to avoid pouring too much water at once, as this can make the growing medium too wet, which can be harmful to your microgreens.
The goal is to keep the growing medium moist, but not waterlogged. You can test the moisture level by sticking your finger into the soil or growing medium. To determine when to water, check the moisture level by touching the soil. When the soil feels dry to the touch, it’s an indication that it’s time to water. If the soil feels moist, then you can hold off on watering for a little while longer.
Remember that overwatering your microgreens can be just as harmful as underwatering. So, keep a regular watering schedule, and adjust it based on the needs of your microgreens. With proper watering and care, you can grow healthy and delicious microgreens right at home.
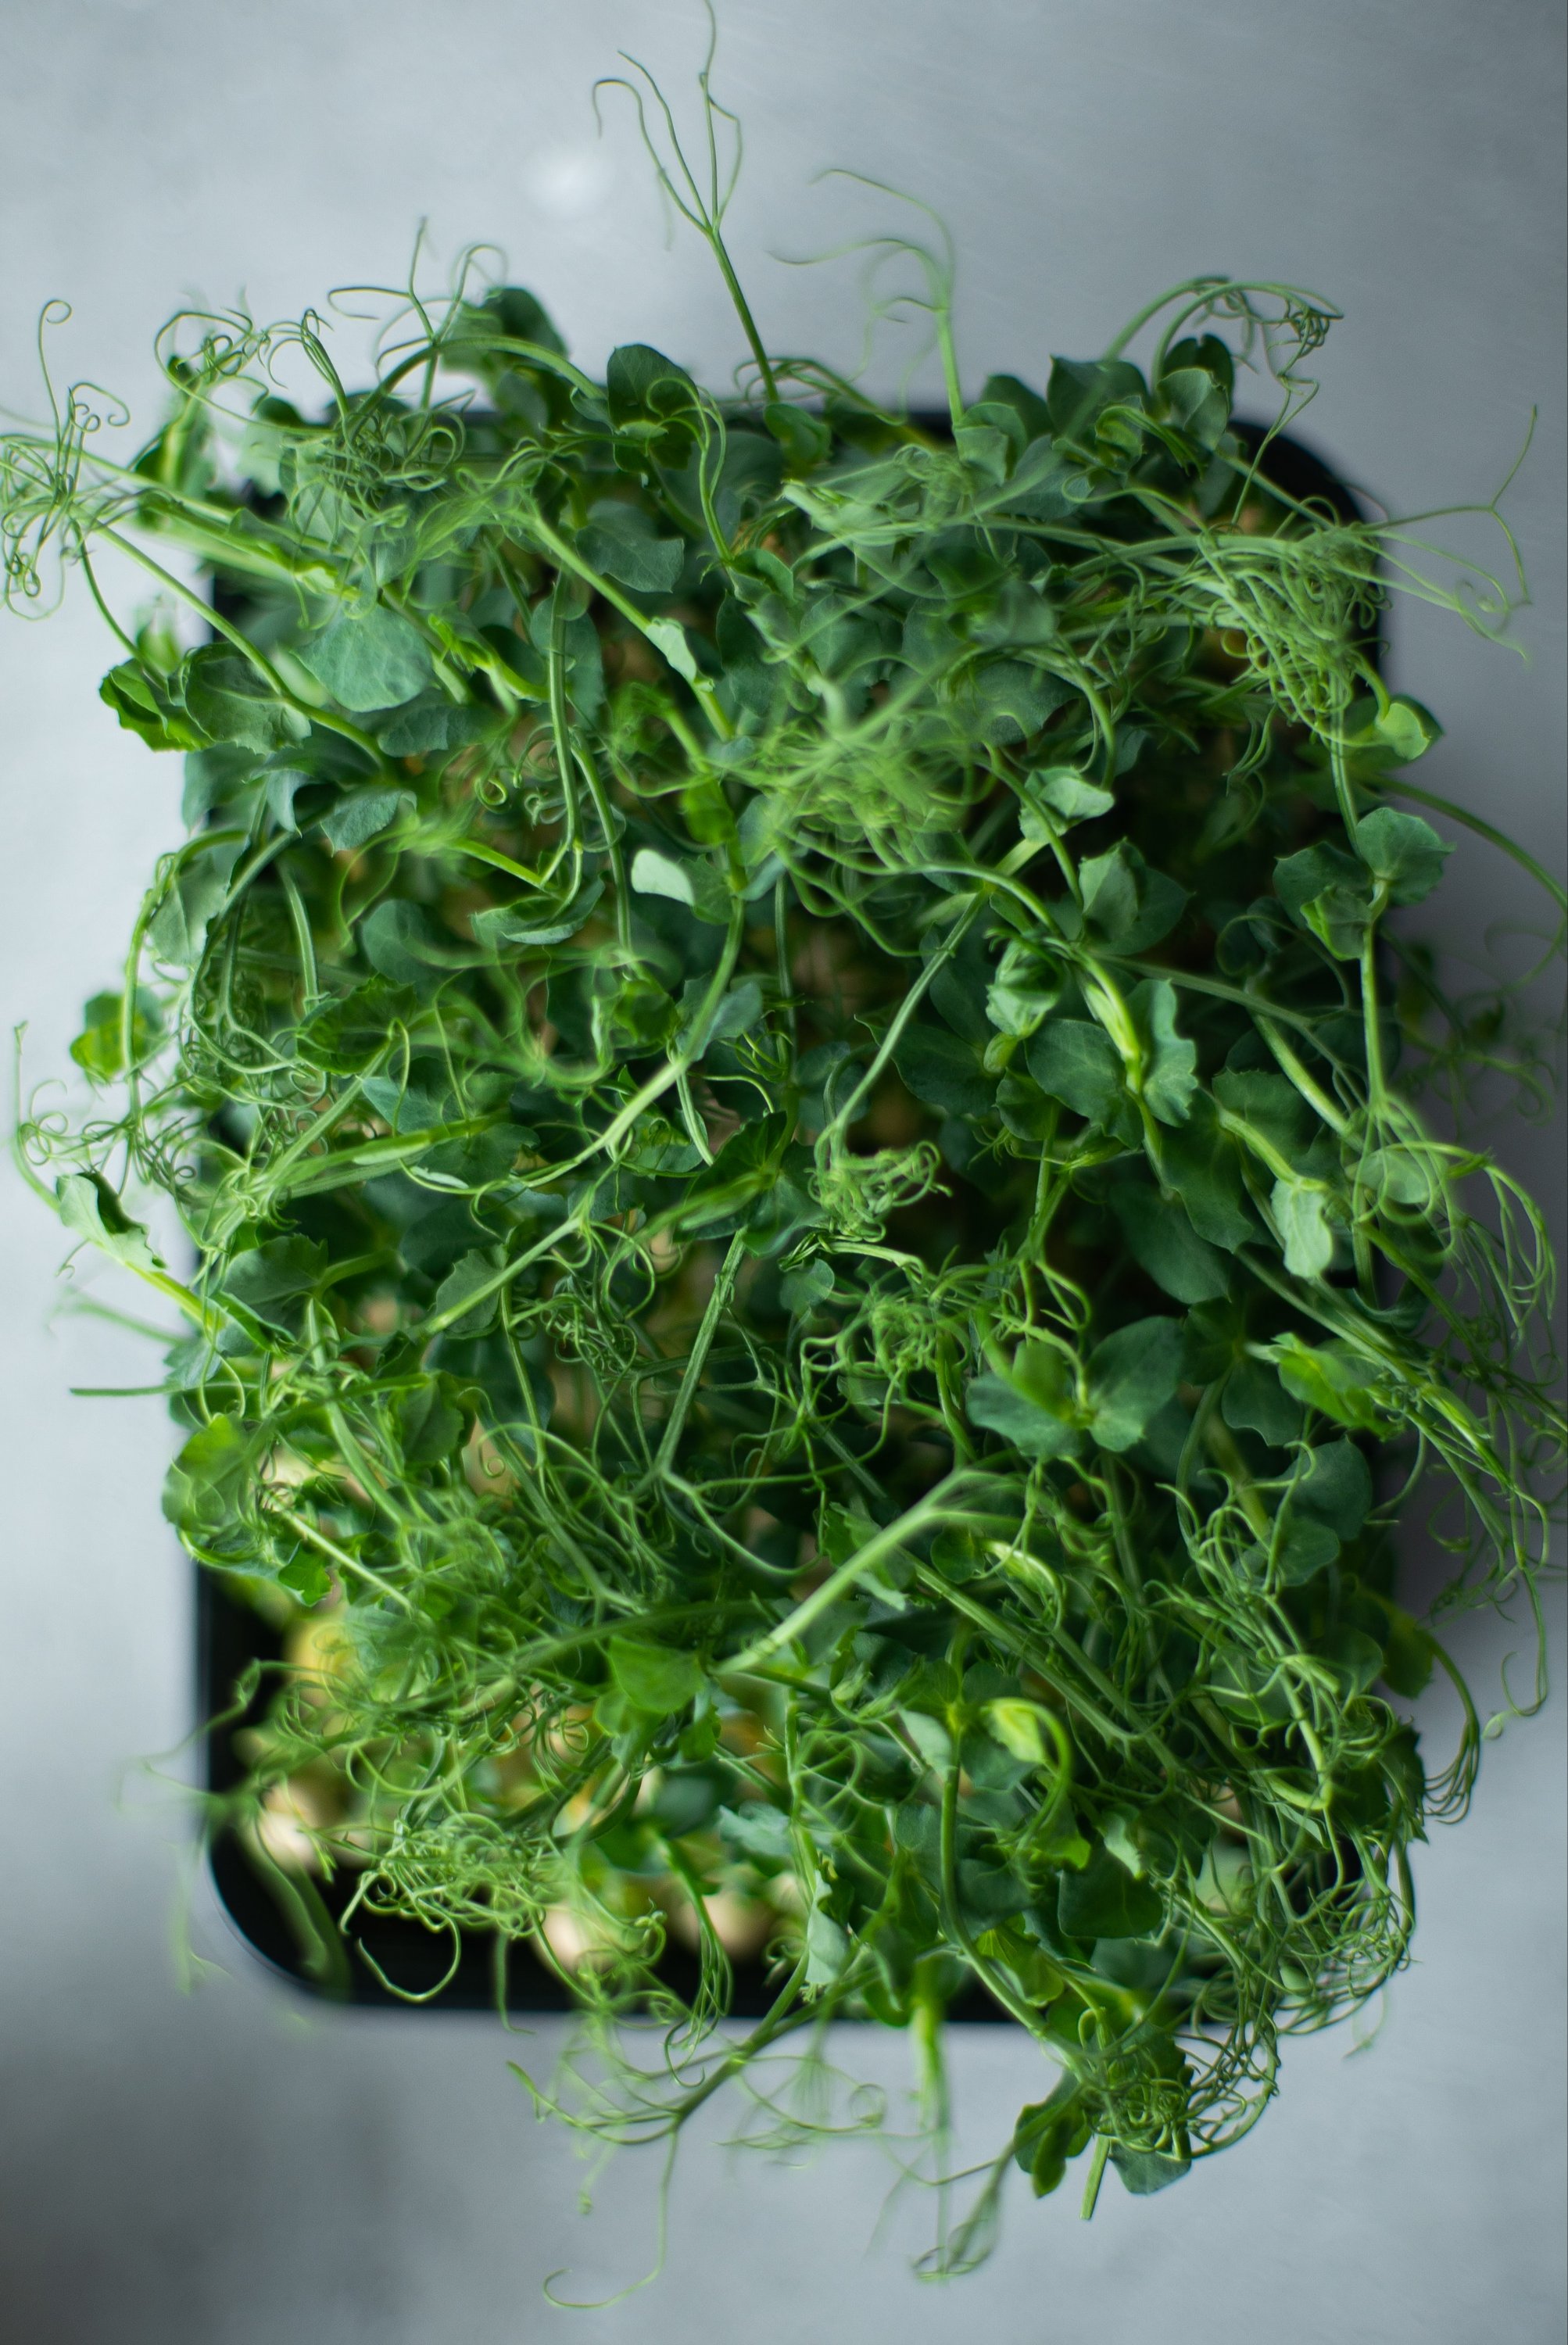
- Harvest your microgreens: Once your microgreens have reached the desired height (usually within 1-2 weeks), harvest them by cutting them with scissors just above the soil line.
When your microgreens have grown to the desired height, usually within 1-2 weeks, it’s time to harvest them. Harvesting means cutting the microgreens so you can eat them.
To harvest your microgreens, you will need a pair of scissors. Carefully cut the microgreens just above the soil line, which is the point where the stem meets the soil or growing medium.
Make sure to cut the microgreens cleanly and avoid damaging the surrounding plants or the growing medium. You can harvest all the microgreens at once or just a portion if you want to continue growing the rest.
After harvesting, rinse the microgreens gently with water to remove any dirt or debris, and then pat them dry with a paper towel. Now your microgreens are ready to eat!
By following these steps, you can harvest your microgreens at the right time and enjoy their fresh and delicious flavors.
Enjoy your fresh and nutritious microgreens in salads, sandwiches, smoothies or as a garnish!

Leave a Reply